If you've been putting off adding a handrail, this guide takes care of that. The CR Stair Handrail Kit ships with everything you need and goes together faster than most people expect.
Time: 2–3 hours. Difficulty: Beginner. Experience: No prior experience needed.
01 — Pick the Right Kit
The CR Stair Handrail Kit comes in five sizes, each matched to a specific stair run length. Your size is determined by the total horizontal distance of your staircase, not the number of steps you count by eye, and not a diagonal measurement.
| Kit | Steps | SKU | Total Horizontal Run |
|---|---|---|---|
| 1 & 2 Steps | 1–2 | CRHR1 | Up to 12" |
| 3 Steps | 3 | CRHR2 | 12.01"–24" |
| 4 Steps | 4 | CRHR3 | 24.01"–36" |
| 5 Steps | 5 | CRHR4 | 36.01"–48" |
| 6 Steps | 6 | CRHR5 | 48.01"–60" |
If your staircase is longer than 60 inches, you'll need to combine two or more kits. Section 03 covers exactly how to measure so you buy the right size the first time.
Not sure which kit fits your layout? Get a Free Quote — we'll spec it for you in 30 minutes. Get a Free Quote →02 — What's in the Box
Before you do anything, lay every component out and check it against the list below. Two minutes now saves you from discovering a missing piece halfway through the job.
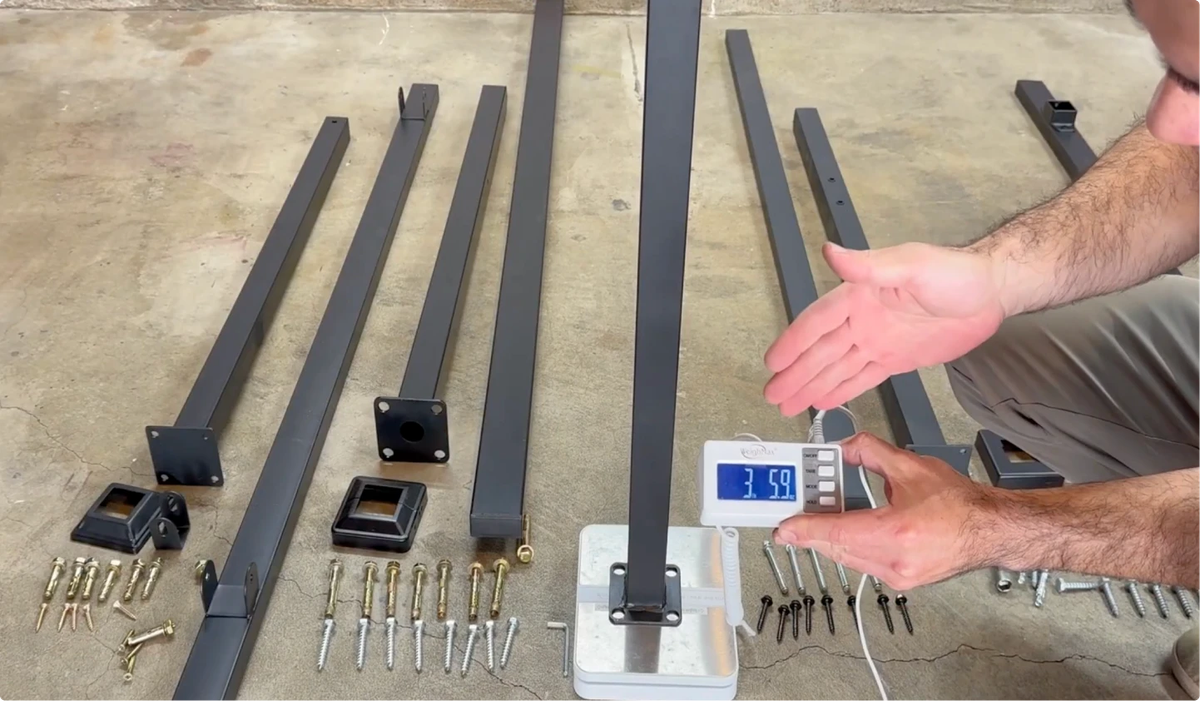 ✓ Top rail — pre-finished, 5-layer weather-resistant coating Included ✓ Middle rail — matches top rail profile Included ✓ Top post — labeled, do not swap with bottom post Included ✓ Bottom post — labeled, do not swap with top post Included ✓ Post caps — one per post Included ✓ SafeLox™ rail brackets — enclosed design, no exposed edges Included ✓ Top rail brackets — holds top rail at correct height and angle Included ✓ End caps — for open rail ends Included ✓ Lag screws — for securing posts to the floor Included ✓ Self-drill screws — for securing rail joints Included ✓ Installation tools Included ✓ Power drill You provide ✓ Drill bits (sized for lag screws) You provide ✓ Tape measure You provide ✓ Pencil or marker You provide ✓ Spirit level You provide
 03 — Measure Your Staircase
Getting the measurement right before you order is the most important step in this whole process. The wrong measurement means the wrong kit, and that means a return.
⚠️ WarningMeasure carefully and order once. Every returned item arrives unsellable. Since it can't go back on the shelf, it goes to a landfill. That's a loss for us and unnecessary waste for everyone. Read our return policy in detail.
Steps Without a Ledge
Measure the depth of each step from front to back, starting from the edge of the first step all the way to the edge of the top landing. Add each measurement together.
Example: 4 steps, each 11" deep = 44" total run → order the 5 Steps kit (CRHR4).
Steps With a Ledge
Look at your stairs from the side. If the front of each step hangs out slightly over the one below it, like a small shelf, your steps have a ledge. Follow these steps instead:
- Measure the full depth of the first step, ledge included.
- Measure the depth of the second step.
- Subtract the ledge portion from the first step's measurement to get its true run.
- Repeat for all remaining steps.
- Add the first step's full depth to the sum of all remaining runs.
Example: First step is 12" deep, remaining 3 steps are 11" each = 12" + 11" + 11" + 11" = 45" total run → order the 5 Steps kit (CRHR4).
⚠️ WarningDon't just count steps. Two staircases can both have 4 steps but very different total runs depending on step depth. Always measure.
ℹ️ InfoThe Stair Handrail Wall Extension lets you connect your stair handrail to a horizontal run at the top of the stairs — sold separately.
Check Your Top Landing Clearance
Before ordering, confirm your top landing has at least 8 inches of free space. That's the room the top rail needs to fit end-to-end without running into a wall or door.
If You Don't Have Enough Clearance
- Use the Wall Extension kit to terminate the rail into the wall instead of extending horizontally.
- Use a Wall Top Rail Connector to end the rail flush against the wall.
- Contact our team — we'll recommend the right combination for your exact layout.
04 — Assemble the Handrail
Here's what makes the CR kit different from most: you assemble it completely on the ground before installation. No holding parts in position on a sloped staircase while drilling as everything gets built flat, then carried up.
Step 1 Identify Top vs. Bottom PostThe top and bottom posts are not interchangeable. Getting this wrong means the rail won't sit at the correct angle on your stairs.
Step 2 Attach the Post CapsPress one post cap onto the top of each post. The cap protects the post end and gives a finished look.
Step 3 Attach the Rail Brackets to the PostsAttach the SafeLox™ rail brackets to both posts. These hold the middle rail in place. The enclosed bracket design keeps water out and leaves no exposed edges.
Step 4 Attach the Top Rail BracketsAttach the top rail brackets to the posts. These will hold the top rail at the correct height and angle once the kit is on the stairs.
Step 5 Insert End CapsPress the end caps onto the open ends of the top rail and middle rail before going further.
Step 6 Loosely Assemble Flat on the GroundWith brackets on both posts, lay the full assembly flat. Loosely connect the top rail and middle rail to both posts. Do not tighten anything yet.
💡 TipDo this on a clean, flat surface like a garage floor or driveway. Having someone hold the posts while you connect the rails makes this step faster.
05 — Mark and Drill the Post Holes
Step 1 Position the HandrailSet the assembled handrail on the stairs in its final position. Bottom post at the base, top post at the top landing. Hold the rail at the correct height and check that it sits naturally with the angle of the stairs.
Step 2 Mark the HolesWith the handrail in position, use a pencil or marker to mark the floor through the hole locations in each post's base plate. Mark both posts before moving the kit.
Step 3 Drill the HolesRemove the handrail and drill straight down at your marked locations using a drill bit sized for the included lag screws.
⚠️ WarningDrill straight down, not at an angle. On a sloped staircase, the instinct is to drill perpendicular to the step surface rather than truly vertical. Use a level on your drill if needed.
06 — Secure the Posts
Step 1 Reposition the HandrailCarry the assembled handrail back to the staircase and align the base plate holes with your drilled holes.
Step 2 Drive the Lag ScrewsDrive the included lag screws through the base plate of each post and into the floor. Drive each screw until the base plate sits completely flush. No gap between the plate and the floor.
💡 TipCheck the rail angle before fully tightening. Step back and look at the handrail from the side. It should follow the angle of your stairs cleanly. If something looks off, adjust now.
07 — Tighten All Joints
With both posts secured, go through the full assembly and tighten every connection. Use the included self-drill screws to fully secure the top rail and middle rail to their brackets. Work from the bottom post to the top.
When you're done, give the rail a firm push and pull at multiple points. Nothing should move. If any section shifts, find the loose connection and tighten it.
ℹ️ InfoIf you're connecting two kits for a longer staircase, or joining the stair rail to a horizontal handrail at the top, you'll need a connector. We carry straight, corner, bend-adjustable, and wall termination connectors. Shop Connectors.
08 — Code Compliance Check
Run through this checklist before calling the job done. If a building inspector is coming, having these verified in advance makes the whole process faster.
Pre-Inspection Checklist ☑ Correct kit size — total horizontal run falls within the kit's specified range. ☑ Top landing clearance — at least 8" of free space at the top. ☑ Posts secured — lag screws fully driven, base plates flush with no gap. ☑ Rail height — meets IRC 34–38" above stair step surface. ☑ No movement — rail firm under lateral push and pull at all points. ☑ All joints tightened — self-drill screws fully seated at every bracket. ☑ End caps installed — no open rail ends. ☑ IBC compliant — the CR kit meets International Building Code requirements.The CR Stair Handrail Kit is IBC compliant and carries a 10-year warranty. If your inspector requests a product compliance document, it can be downloaded from your order confirmation page.
Have questions about your layout or local code? Our team responds in about 10 minutes. Contact Us →Frequently Asked Questions
How do I know which kit size to buy? ▾ Measure the total horizontal run of your staircase from the front edge of the bottom step to the front edge of the top landing. Match that to the size chart above. If your run is over 60 inches, you'll need to combine two kits. What if my stairs are longer than 6 steps? ▾ Combine two or more kits. Our team can tell you exactly which combination you need. Use the free quote form and describe your stairs. Can I connect the stair handrail to a horizontal handrail at the top? ▾ Yes. Use the Straight Adjustable Top Rail Connector to join the stair kit to a horizontal handrail at the top landing. This is one of the most common configurations. My top landing doesn't have 8 inches of clearance. What do I do? ▾ The Wall Extension kit lets you terminate the rail into the wall rather than extend horizontally. The Wall Top Rail Connector ends the rail flush at a wall surface. Contact our team with your measurements and we'll tell you exactly what you need. How many stairs require a handrail by code? ▾ Per IRC Section R311.7.8, any stair flight with four or more risers requires a handrail. Some local jurisdictions start at three. Check with your local building department if you're unsure. Is the CR kit suitable for outdoor stairs? ▾ Yes. The 5-layer coating on all CR rails is weather-resistant and designed for year-round outdoor exposure. Same installation process applies. What's the weight rating? ▾ The CR Stair Handrail Kit meets the R301.5 load requirement and is engineered against the R301.5 lateral load case. We publish the calculation rather than a test result. At that load, the flooring gave out before the handrail did. What's the warranty? ▾ 10 years. Register your product within 60 days of purchase to activate it.On strength claims: we hold no ICC-ES evaluation report or Intertek CCRR for these systems. Our load cases, material yields and the full arithmetic behind every span figure are published, with a live calculator, on our Engineering & Code Compliance page.